
Foundation paper pieced templates are the blueprints you'll use to execute your project with success. It's important that the specifications are accurate or you'll find yourself with a project that is too small, too large, or pieced incorrectly. Understanding how FPP templates are designed and how they should be used is the first step for any FPP pattern.
Below I share some important things to identify before you print or copy the pattern templates, as well as how you can prepare your templates to minimize any chances for errors when piecing.
Supplies You'll Need
-
Paper (copy paper, newsprint, or specialty FPP paper)
-
Access to a printer or copier
-
Ruler with 1" markings
-
Paper scissors
-
Glue stick or tape
-
Pen or pencil

Choosing the Best Paper For You
There are lots of options when deciding what paper to use for your FPP templates. You'll want to consider the following: pricing, weight, transparency, size, and accessibility.
There is "foundation paper" marketed for FPP projects specifically, however they typically come in at a higher price point. Newsprint is a great option, but can be difficult to source locally.
Personally, I use regular copy paper as it's easy to find and cost-effective. It's moderately transparent (more so, when held up to a light source), which helps to place things accurately. It's a personal preference, so I recommend that you experiment with various options to find what works for you.
Reading the Pattern Instructions
Many quilters will tell you that the most important step when beginning any project is to read the pattern in its entirety. We do the same for FPP projects - even if there seems to be far fewer steps in the pattern.
While the concept of foundation paper piecing remains relatively similar from pattern to pattern, there are differences in how designer's prepare their templates.
For example, if you are working on a pattern from a magazine, you may be required to scale the pattern piece before printing. Magazines are limited to a 8.5 x 11 piece of paper, and prefer not to include inserts or templates that need to be taped together.

You may also find that some designers do not include seam allowances, as it can be easier to scale. These details are important and will influence how you prepare your templates.
Printing or Photocopying Your FPP Templates
Here are a few things to look for when printing your FPP templates (pattern pieces):
-
The printing scale. Most patterns will state that you should print your pieces at 100% scale. When printing from a PDF pattern, you can set this percentage in your printer's settings pop-up window. When photocopying the templates, just hit 'copy' to get a duplicated print-out.

-
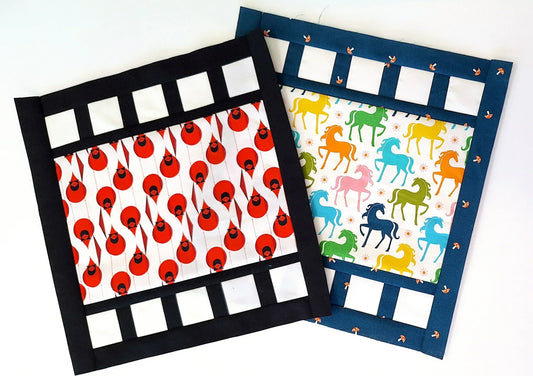
The template sizes. Your FPP pattern may provide the block in multiple sizes. Confirm which project size you'll be making, and which template sizes you will require. For example, The Square of Pegasus pattern includes templates to make an 18" x 18" block and a 36" x 36" block.
Designers may include multiple sizes to make it easier for quilters to find the perfectly-sized project without having to experiment with different scaling percentages or alter seam allowances.

-
The number of copies. Your FPP pattern may require that you print out the same template multiple times in order to achieve your desired project size. For example, The Square of Pegasus pattern requires the following quantities per project:
-
(2) copies of the small templates for the pillow and wall projects
-
(18) copies of the small templates for the throw project
-
(2) copies of the large templates for the baby project.
Keep in mind that if you're working on a project with a single-overall design, you will only require one of each template. Read the pattern instructions to confirm.
-
-
B/W or Colour. This is a preference. Some patterns use colours to identify the fabric to use for each section. If printing in B/W is your only option, just take some time to update the templates with any relevant information after printing (i.e. write in the colour for each section).
Printing Your FPP Templates Single-Sided
After confirming the scale of your templates and loading your preferred paper into the printer, confirm that you're printing your templates single-sided before hitting 'Print'.
We will be using the printed side of the templates to sew our fabric to the wrong-side (blank side). It's a bit backwards - I know, but it'll all make sense once you get started! Promise.
Confirm the Test Square on Each Template page
Most FPP patterns will include a test square on each of the template pages. The test square will be a specific size - usually 1" x 1" - and should be measured after printing to confirm the templates are the correct size.


TIP: Print page one of your templates first. Confirm that the scale is correct by measuring the test square, then print the remaining pages.
Cutting Our Your FPP Templates
Cut out each of your templates with paper scissors. Leave 1/8" excess paper around the dashed outer border. This approach will allow you to neatly trim down the template once it has been pieced.

Leave 1/4" to 1/2" of excess paper along the edges that must be joined to another template. In Ships & Violins patterns, those edges are identified by a single dashed line with a black box containing a number. Leaving some extra room will make it easier to glue or tape the templates together accurately (see below).

Joining Templates
You may be required to join multiple cut-outs together to make a larger template. Each designer will have their own way of communicating this to you.
For all the Ships & Violins patterns, you will be joining the numbered dashed lines together in numerical order. This means you will begin by finding two templates with the number 1, matching the dashed lines carefully, and taping or gluing them together. Then move on to the number 2, and so.
Hold your template up to a light source, like a window, for the best results.

Following the numerical order is crucial if the template requires multiple pieces. You may not be able to join the templates if they are not taped/glued together in this order.
You may choose to redraw the lines hidden by any excess paper.

Pre-folding Your Templates (optional)
Many quilters have found it helpful to pre-fold their templates before beginning to piece.
To pre-fold your templates:
-
Line-up the tapered edge of an Add-a-Quarter ruler or the edge of some cardstock with the sewline between sections 1 and 2 of your template. I refer to the solid lines between sections as "sewlines," because these are the lines you will stitch or "sew" along when piecing.

-
Fold the template over the ruler or cardstock to create a crease along the sewline.

-
Repeat for the second sewline between sections 2 and 3.

-
Fold the template.

Continue this process until you have creased all of the sewlines on your template.

How to Decode Your FPP Templates
Pattern designers used various coding systems on FPP templates to communicate the following information: the section, the fabric/colour required, and the sewing order.
When I first started to design FPP patterns, I included cutting instructions to help beginners. The Square of Pegasus, Orion's Spur, and Arcturus Shield patterns all include cutting instructions.
As a result, the code on the templates communicate the following information:
-
The first letter refers to the fabric colour.
-
The first and second letter combined refers to the fabric piece in the cutting instructions.
-
The number refers to the sewing order.
Let's apply this to section 1 of template G in The Square of Pegasus pattern, which says BB1:
-
B refers to fabric B.
-
BB refers to a 4 1/2" x 2 3/4" fabric B rectangle.
-
1 means this will be the fabric piece to be sewn to the template.
For the patterns following Arcturus Shield, I decided not to include cutting instructions. As a designer, it can be rather arduous to measure out each piece of a complex FPP pattern. It's time-consuming and easy to make errors, so I cut them out.
But rest assured that as you become more comfortable with the technique, you'll find that you will be able to cut fabric as-you-go, which is how I approached Lyra's Hymn and Nesting Phoenix.
As there are no cutting instructions included in those patterns, the code on the templates were shortened to one letter and one number:
-
The first letter refers to the fabric colour.
-
The number refers to the sewing order.
Quilters cut a fabric piece from the correct fabric colour in a size that will be suitable to cover the section.
Be sure to understand the coding system for an FPP pattern before beginning. It's likely that they will differ from designer to designer, and project to project.
Adding Notes to Your Templates
Once your templates have been printed, feel free to add any notes that may be helpful. For example, write in the fabric colour for each section to avoid sewing the wrong fabric to the template by accident. Or prepare a swatch card to help you stay organized.

TIP: If you're using pattered fabrics for your project, I recommend writing "FDFD" in section 1 of EACH template. FDFD stands for First Down, Face Down, and will serve as a reminder that the section 1 fabric piece should always be placed face down under the template (which is face up).
As you work through more FPP patterns, you may establish other helpful notes to include on your templates before getting started.
Wrap Up
Taking the time to prepare your FPP templates correctly is an easy way to set yourself up for success. A little bit of effort at this stage will make a big difference when you finally sit down at your sewing machine and get piecing. Promise!
Frequently Asked Questions
I printed the templates as directed in the pattern, but they seem to be the mirror-image of the design. Did I do something wrong?
No, you didn't print the templates incorrectly. The reason the templates are the mirror-image of the design is because the fabric pieces will be added the back (blank) side of the template.
The blank side is technically the "right side" of the project. If you layout the templates with the blank side up, you'll see that they fit together just like the design on the cover of your pattern.
I printed my templates but the test square didn't measure correctly. How can I fix it?
Not all printers are made equal. You may find that even when your printer's scale is set to 100% that the 1" square doesn't measure correctly. I recommend that you experiment with the percentage until it's correct. If the 1" square is too small, increase your scale percentage in small increments (i.e. 103%); if the 1" square is too big, decrease your scale percentage (i.e. 97%). Make a note of the correct percentage for future patterns.
Can I change the size of a pattern's templates?
Yes, you can scale the template to any size you'd like using your printer settings. Keep in mind, that the entire template will be scaled, so you may not have an accurate 1/4" seam allowance around the perimeter of your template. I recommend that you re-draw the seam allowances before piecing.
I printed my templates double-sided, can I still use them?
You can only use one side of the double-sided sheets. If you choose to use them, make sure to identify which side you will be piecing. Re-print the odd or even pages to make up the remaining templates. Or save yourself the hassle, and re-print the templates single-sided. Save the others as scrap paper.
My pattern templates don't have any black squares with numbers. Do I still have to join them?
Not every Ships & Violins pattern requires that you join templates. The joining of templates only applies to templates that are too large to fit on a 8.5" x 11".
The pattern I'm using has a solid line along the outer edge and a dashed line on the inside. Does this change anything?
No, every designer has their preferred style. Both lines, whether dashed or solid, represent the seam allowance along the perimeter of your template.
The pattern I'm using just has numbers in each section. How do I know what fabrics to use?
Read the pattern carefully. The designer may include recommendations on how to place your fabrics. Or it may be a scrap-friendly pattern, and any fabric piece will do!
The pattern I'm using says seam allowances are not included? What do I do?
Prepare the templates as per usual. When piecing, ensure that there is at least 1/4" of fabric beyond the template on all sides. When you've finished piecing the template, use a ruler to measure a 1/4" beyond the template, and trim. You should have an accurate 1/4" of fabric along the entire perimeter of the template.
Do you have a question you'd love to have answered? Comment below!


1 comment
Please help me understand the ‘Preparing Templates’ section of Prion’s Spur.
It says to join templates with the same numbers in numerical order. Tape together.
My pattern doesn’t have any numbers to join. And, what is the purpose of doing this?