
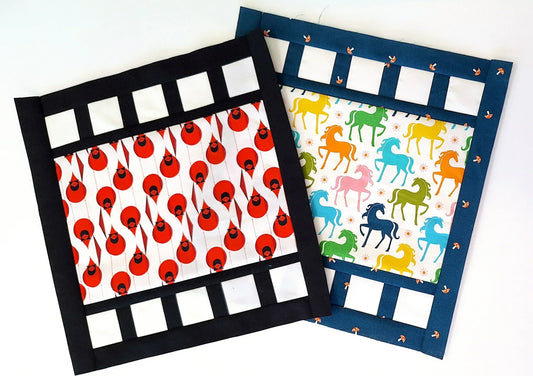
A flat seam is an essential technique in quilting, second only to an accurate 1/4" seam allowance. We can't underestimate the importance of a flat seam as it has the capability to improve every stage of quilting thereafter.
For example, a block that's been pressed flat can be trimmed easily and accurately. Any "bouncy" seams - that is, seams that are rounded - can skew our measurements and therefore, our accuracy. Flat seams also facilitate a swifter quilting experience with fewer bulky areas to maneuver under your sewing needle.
Investing in flat seams in the early stages of your project will benefit you in large degree as you continue to work through each step of making a quilt.
So how do you get your seams flat and is there more to it than just a hot iron?
Let's dive into some techniques that'll help get you started.
Below you'll find 4 ways to achieve flat seams in your next sewing project - quilting or otherwise.
Note: For this blog, please assume that the fabric and thread weight are the same, but bear in mind that these too can affect the outcome of your seams.
4 Strategies for Flatter Seams
Press Your Seams Open
This is a controversial option, but an option nonetheless. Many quilters fear that given the scantness of a 1/4" seam allowance, pressing a seam open will compromise the strength and integrity of a quilt top. It doesn't take much to accidentally fray a 1/4" seam allowance into an 1/8" and then you're only a few more tugs away from re-doing your hard work....
And while I do agree that pressing to one side is a stronger alternative and generally good practice, I also believe there's a time and place for pressing seams open as well.
If you decide to press your seams open, consider the following:
- Does the fabric I've chosen fray without much effort? Loosely woven fabrics like linens or shot cottons will fray easily.
- Can I adjust my stitch length? Reinforce the strength of your seam allowance and reduce the effects of unravelling fabric by using a smaller stitch length.
- Will I need to handle each piece or quilt block multiple times? The more you handle your fabrics, the more they will fray.
- Does pressing to one side make piecing easier? Some quilt blocks are easier to piece if you nest the seam allowances.

Above: Photo of two seams pressed to alternating sides for nesting.
- How will I be using this project? If your patchwork project is destined for a wall hanging where it will get little wear and tear, then pressing open is just fine.
- How will I quilt this project? If you're planning to use a dense quilting design (4" or less) or you will be stitching along the seam lines, your seam allowances will be reinforced as a result.
If you've considered all of those risks and benefits, then perhaps pressing open won't have any dire effects on your next quilty project.
Technique Summary
Pros:
- Free!
- Easy, but watch your fingers!
Cons:
- Takes slightly more effort than pressing to one side.
- Can compromise the strength of your patchwork.
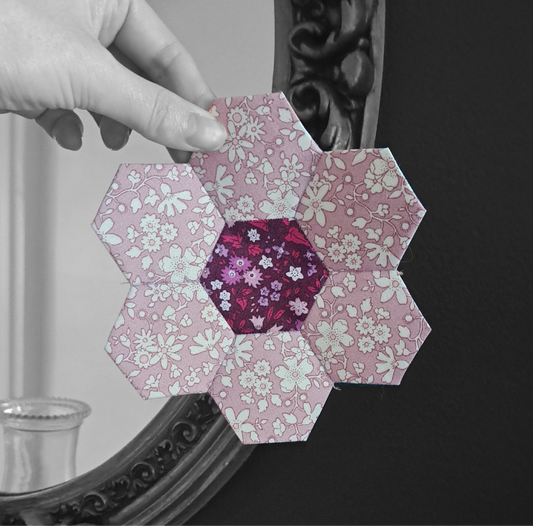
Spinning Seam Allowances
This is a great technique when sewing a quilt top that comes together in a square or rectangular grid. As mentioned in the "Pressing Seams Open" section above, it can be useful to press your seams to one side when piecing rows and columns of fabric together.
You're able to "nest" your seams together - that is, butt the seam allowances against each other to make matching points easier - without much effort. It's a very handy technique, but it can create a little bulk in the centre of the four-patch, where all four pieces of fabric meet.
Spinning the centre seams helps to disperse the bulk among the entirety of the intersection and therefore creating a flatter finish.
You can try this technique by following my step-by-step tutorial.

Above: The back of a quilt block with spun seam allowances.

Above: The front of a quilt block with spun seam allowances. The nested seams help to achieve neatly matched intersections, and the spun seam allow for a flat finish.
Technique Summary
Pros:
- Free!
- Relatively easy once you get the hang of it.
Cons:
- Can be tricky to execute at first.
- Limited to a grid-like quilt construction.
- Takes more time than pressing seams open.
- Requires extra care when unpicking stitches.
Tailor's Clapper
The tailor's clapper has been around for decades. It was primarily used for garment making and tailoring as the name suggests. The clapper works by simultaneously absorbing the moisture in a steam-pressed seam while applying pressure to set the seam flat.
Using steam to press your seam in quilting is also a distinct preference between quilters. I like to use steam from time to time, as it relaxes the fabric and can create a flatter seam. Combined with the clapper, it's magic! Just be sure to press your seams with the iron and not to slide your iron along the seams as it may distort your piecing.


Tailor's clappers come in a variety of sizes - pictured is a Fabric Spark 12" clapper made of maple. I prefer this length for pressing long strip sets. You can find it here.
Technique Summary
Pros:
- One-time cost. You shouldn't have to buy another one for the rest of your quilting career!
- Easy to use.
Cons:
- Requires 5 to 8 seconds to set the seam.
- Bulky for transport.
Easy Precision Piecing Pen and Solution
The propriety solution used in this product is added to a pen applicator, and applied to the right side of the fabric - above the seam allowance. The solution prepares the seam with a fabric relaxant that can be set in place with a flash of heat from the iron.

Above: Glide the Easy Press pen along the right side of your block, above the seam allowances, and press with a hot iron until evaporated.

Above: The back of the block after using the Easy Press Pen and solution.
The results are visible immediately, and the seam allowance will remain flat as you continue to work with your piece. Both stacks of fabric in the photo below have the same number of blocks. The left image has been pressed using the Easy Press pen and solution and the right image has been pressed on a wool mat with a hot iron. It's a pretty significant difference!

That being said, if you'd like to invest in your flat seams, then I would highly recommend the Easy Precision Piecing starter kit as a great place to start. The results are obvious, and it's an asset in any sewist's tool kit.
You can purchase your Easy Precision Piecing starter kit at your local quilt shop.
Technique Summary
Pros:
- Easy to use
- Small product that transports easy in a sewing kit
Cons:
- On-going cost for refills
Additional Tips for Flat Seams
Wool Pressing Mat
This is great portable option for pressing. The makeup of the mat will help to absorb heat from your iron and disperse it evenly on the back of your block. Added benefit: your block or strip will be held in place with the fibrous surface as you work.
Hard and flat surface
It might be time to retire that wonky ironing board you borrowed from your parents. The surface you press on is as important as how you press. If your surface is too plush, you won't achieve pressure. This is an alternative to a wool mat option. A hard surface will help to create resistance on your block when pressing rather than soften the impact like a traditional ironing board.
My Preference for Achieving Flat Seams
What's my preference for achieving flat seams? Well, I hate to say it, but it depends. I reference and execute these techniques on a regular basis. Determining when I use them depends on the project or obstacle at hand. In many cases, I combine the techniques to maximize success or improve my technical capability.


1 comment
Do you know if the precision piecing solution does any damage to a wool pressing mat? I recently ordered that solution to try it out. Thank you for this post! Revisiting basics is a great way to learn something new.