
As a quilt pattern designer, I'm always revisiting past designs to see if other project can bloom from the same elements. My Fountain View quilt pattern continues to gift me with ideas, so I made this tutorial to share a new pillow project with you.
This tutorial is an extension to the pattern and offers you a third pillow design option. You'll get an opportunity to try curved piecing and fusible raw-edge appliqué - the two main techniques in the Fountain View pattern. I encourage you to work through this smaller project (or the other two pillow options included in the pattern) before trying the full throw quilt size.

Supplies:
- The Fountain View pattern includes the drunkard's path templates and appliqué shapes used in this tutorial.
- Fusible web (Heat n' Bond Lite or Wonder Under).
- 20" x 20" square of batting and inexpensive cotton for interior of pillow.
- Five fabrics (1/2 yard in fabric A and scraps for fabrics B through E). You can use more or less colours if you would like.
- Thread to match your appliqué fabrics (fabrics B through E).
- Basic quilting supplies.
- Washable glue.
- Pillow insert measuring 18" x 18".
Step 1: Prepare Your Swatch Card
In order to keep this tutorial simple, the fabrics have been limited to five colours. The fabrics identified in this tutorial do not correspond to the fabrics in the Fountain View pattern; if you would like to make pillows to match your Fountain View quilt use the fabrics indicated in the full pattern. Download this free swatch card to help you stay organized.
For this tutorial I'm using Oakshott cottons. The fabrics are as follows:
- Fabric A (Background) is cream.
- Fabric B is light blue.
- Fabric C is dark blue.
- Fabric D is light pink.
- Fabric E is dark pink.
Step 2: Cut Background Blocks Using Templates
Using the templates included in the full pattern, cut (3) Arch B in fabric A and (3) Qtr C in fabric C. Rotate and nest templates as shown below to conserve fabric. Cut (1) 8.5" x 8.5" square from fabric A.
You will have (7) cut pieces once you've completed this step.

Step 3: Sew Drunkard's Path Blocks
Fold and finger press three creases along the curved edge of (3) Arch B pieces in fabric A and (3) Qtr C pieces in fabric C by folding them in half, and then folding each edge into the centre crease as shown below.
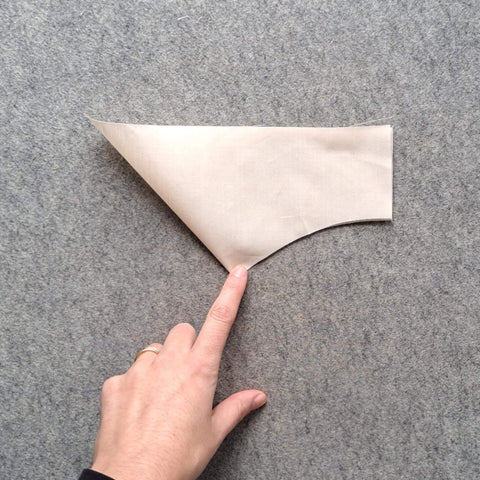


Add a dab of glue to one corner of the Arch B piece as shown above.
Place the Qtr C right side down on Arch B and secure using the dab of glue as shown below.

Bring the opposite edge of Qtr C over and secure it to the opposite corner of Arch B with another dab of glue.

Pin the two pieces together at each of the three creases as shown below.

Sew pieces together with a 1/4" seam allowance.

Press toward the Qtr C piece as shown below. Repeat to make two more drunkard's path blocks.

Step 4: Prepare Templates for Fusible Raw-Edge Appliqué
Reference the photo tutorial on fusible appliqué included in the Fountain View pattern, if needed.
Trace the following templates onto the smooth side of the fusible web:
- (2) App A
- (1) App C
- (2) App C-R
- (2) App E
You will have traced (7) templates once you've completed this step. Cut the templates out with 1/8" of excess fusible around the drawn lines. Fuse the templates to the wrong side of your fabrics as listed below.
- Fabric B: (1) App C and (2) App C-R
- Fabric C: (2) App A
- Fabric D: (1) App E
- Fabric E: (1) App E
Cut out along the drawn line once cooled.
Step 5: Place App A Pieces on Background Block
Remove the backing of both App A pieces. Place both on the 8.5" x 8.5" background block as explained in step 4 of the throw size instructions in the full pattern. Do not fuse yet. Pin in place only.

Step 6: Sew Background Blocks Together
Place (2) drunkard's path blocks right sides together. Pin and baste to ensure the curved seams match. Sew using a 1/4" seam allowance along one side to make one half. Press to the left.

Place (1) drunkard's path block and (1) 8.5" x 8.5" square in fabric A right sides together. Take care to ensure alignment between the curved seam and the App A piece. Adjust if needed. Sew using a 1/4" seam allowance along one side to make the second half. (You should be catching 1/4" of the fusible in your seam allowance.) Press to the right.

Place both halves right sides together by nesting the centre seam. Pin to ensure the curved seams match. Take care to ensure alignment between the curved seam and the App A piece. Adjust if needed. Sew using a 1/4" seam allowance. Press open. Fuse both App A pieces in place carefully.


Step 7: Square Your Project
Square your project to 16" x 16".
Step 8: Add Borders to Pillow Top
Cut 1 1/2" strips from fabric A and attach them to the left and right of your pillow top, then the top and bottom.
Step 9: Place Remaining Appliqué Pieces on Pillow Top
Place the remaining appliqué templates as shown below. (Disregard the colours of the appliqué pieces if you've chose to make the five fabric version.) Reference step 12 of the full pattern for tips on how to overlap your pieces for the best results. If you need to trim your pieces to achieve a neater placement, feel free to do so. Fuse in place.

Step 10: Appliqué Pieces on Pillow Top
Attach the appliqué pieces to your pillow top. Using your preferred appliqué stitch and matching thread. Test your stitch on scrap fabric before beginning on your final project. Be sure to change the foot on your machine!
For this sample I used matching Aurifil 50wt thread and a tight zig zag stitch (satin stitch).

Tip: When stitching your App C templates on, avoid breaking thread by continuing to stitch from one template to another.


Step 11: Make a Quilt Sandwich, Baste, and Quilt
Make a quilt sandwich by layering your inexpensive cotton square (right side down), batting, and pillow top (right side up) as shown below.

Baste layers together using pins.
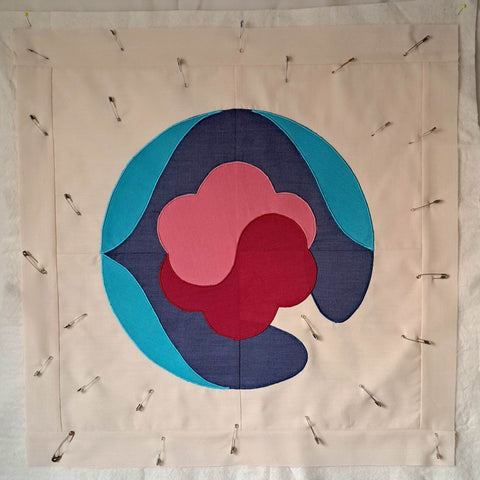
Quilt your pillow top as desired.
I chose to quilt circles around the appliqué design. I used the foot on my machine as a reference to measure equally-spaced lines.
TIP: Avoid burying threads by starting to quilt near one of the seam allowances on the quilt top. Once you've completed one circle, stitch-in-the-ditch along the seam allowance before beginning your next circle.


Step 12: Square Your Project
Square your project to 18" x 18".
Step 13: Make Your Envelope Pillow Backing
Read my easy envelope pillow tutorial included in the full pattern to complete your envelope backing.
More Project Ideas:
Browse the Fountain View throw size mock-ups below for some inspiration. Colour your own version by visiting Quilt Ink.


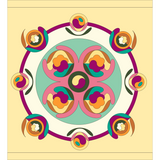
The Fountain View pattern includes the two appliqué pillow designs shown below.
 .
. 
All the patterns in the Constellations Series feature 18'" x 18'' blocks for the perfect pillow set.
The Flight Series includes three different and cohesive pillow designs.
