
The Flight Series requires that quilters draft their own curved templates. Below is a step-by-step tutorial to illustrate how you will use scraps of paper and the provided coordinates to sketch and cut your templates!
Materials
- (2) 8.5" x 11" sheets of paper (you can use scraps of paper too!)
- Pen or pencil
- 24" cutting mat
- 12" clear ruler
- scissors
- tape

Step 1: First, we'll be creating the base for our template. We will need a 4 1/2" x 15" rectangle. Place (1) sheet of paper matching the bottom-left corner of your cutting mat.
(For this example the long edge runs parallel to the bottom edge of the mat. In some cases, it will be more economical to place your sheets of paper with the short edge along the bottom.)

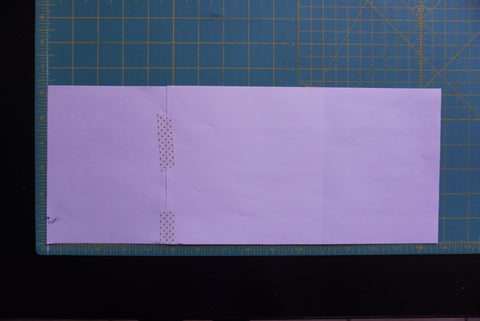
Step 2: Place the second sheet of paper overtop the first until its right edge matches the 15" mark on your cutting mat.

Step 3: Tape both sheet together (front and back).
Step 4: Using a 24" clear ruler, mark a 4 1/2" x 15" rectangle on your sheet. Cut along the drawn line. This is the base of your template.


Step 5: Return the rectangle to the bottom-left corner of your cutting mat.
Step 6: in order to create your curve, you will plot a series of coordinates that will be connected later.
Your coordinates will appear in a chart like this:

The bottom-left corner of your mat is (0, 0), and the coordinates are located along the x-axis and y-axis of the rectangle. Let's plot the first coordinate (0, 1").
- Use the ruler along the bottom edge of your mat to identify the x-coordinate. In this case it's 0.
- Use the ruler along the left edge of your mat to identify the y-coordinate, 1".
- Label "Point 1" where the coordinates intersect.
As you move further along the rectangle, your 24" ruler will replace the ruler along the left edge of the mat. Let's plot Point 2 (3 1/2", 1 1/4"):
- Use the mat's ruler to identify the x-coordinate (3 1/2").
- Place your 24" ruler at that coordinate and perpendicular to the bottom edge of the mat.
- Count up the ruler to place your y-coordinate (1 1/4").


Continue using this method to plot your remaining points.

Step 7: Draw your curves by connecting the points. When drawing my curve I like to orient my rectangle as shown below. I find it easier to draw a smooth line toward me rather than left to right.

TIP: Look at the point you're heading toward. This technique will help guide your hand in the right direction.
You will get a smooth line if you draw your curve in a single motion. You don't have to pass through each point exactly - so don't sweat it! The key is to achieve a smooth curve that is as close to the points as possible.
Step 8: Cut out the curve and label it as stated in the pattern. Now you're ready to get assembling!


Give this technique a try, and then getting piecing your own Flight Series quilt tops!
